Knitted Advent Calendar
This is the first of 24 ornaments and an Advent wall hanging originally published on my blog, December 1-24, 2005. I’m considering redesigning some of the ornaments and releasing them, every other month, as a year-long Advent knitting project. If that sounds like something you’d like to participate in, please email me and let me know: knitandcrochetwithsuzann@outlook.com.
I’m posting on Twitter @textilefusion and Instagram @suzannthompson, too. Hope you’ll follow me to see all 24 ornaments—or search #KnitAdvent.
It’s the First of December, and that can only mean one thing for households with children—opening the first door of the Advent calendar. When I was growing up, my Oma always sent Advent calendars to my brothers and me, from Germany. I loved opening the doors and finding the quaint little pictures of gifts and Christmas motifs.
When my mom became an Oma, she made sure my daughter had Advent calendar, only those calendars had a piece of chocolate behind each door.
Back in 2002, I decided to knit an Advent calendar. It shows a Christmas tree with buttons on it. Twenty-four knitted ornaments, mounted on felt, are hung, face down, from a row of buttons that runs along the bottom, as in the photo, above.
Each ornament has a number embroidered on the back with free-hand zigzag on the sewing machine. Every morning, starting December first, we find the ornament with the proper number, and hang it from button on the tree. When the last ornament is moved to the tree, it’s Christmas Eve.
Follow along this month, when I’ll post an ornament each day, ending on December 24. The first ornament is a star, which we hang so that it rests at the top of the tree. I really like this one, because it is dimensional.
Make Your Own Buttons Workshops
Do you have trouble finding the perfect buttons for your handmade garments? Don’t agonize. Make your own! Learn basic polymer clay techniques and create several stunning button styles with me, Suzann Thompson, author of Polymer Clay for Everyone.
(Polymer Clay for Everyone is out of print, but you can buy it online. Try alibris.com, abebooks.com, and amazon.com. It’s usually a bargain!)
I offer two 6-hour workshops for beginners, about making polymer clay buttons. Each workshop stands alone, so you can take the workshops in any order. I cover polymer clay basics and hints in both workshops.
So, even if you’ve never tried polymer clay crafting before, you are welcome to spend a day or two playing—and I do mean playing—with polymer clay.
You’ll take home at least two dozen delightful, machine-washable and dryable buttons.
To book this workshop, please email me at knitandcrochetwithsuzann at outlook dot com.
Make Your Own Buttons Workshop
In “Make Your Own Buttons from Polymer Clay,” we start with a fake or faux lapis button technique. The buttons are complete with sparkly inclusions, just like real lapis.
Easy but effective swirl buttons are next. They are quick to make and customize with the perfect colors for your garment or other project. These are my favorites.
Millefiori is a glass technique that polymer clay crafters have taken over and made their own. We’ll do a group millefiori project, and the buttons will turn out something like this:
After lunch, we make crazy polymer patchwork buttons and learn a clever way to use clay scraps. Here are some patchwork buttons:

Make More Buttons Workshop
“Make More Buttons” is another six-hour workshop for beginners. It is completely stand-alone, meaning that you don’t need any experience with polymer clay to take this class. All the buttons we make in this workshop are different from the ones in my other button workshop.
We start with imitation or faux turquoise, then move on to a traditional millefiori flower design. The word “millefiori” means “thousand flowers.” You’ll be surprised at how simple and versatile this technique is.

After lunch, we tackle mica-shift, a technique that results in sophisticated-looking and subtle buttons. Finally, we make polymer clay mosaic buttons and learn clever ways to use scraps.
Here are photos from my previous workshops. Participants had fun and made lots of buttons!
Grade school students made these buttons in a 4H sewing camp:
Crochet Charm Lace Examples
Our bookshelves have filled with books of instructions for the cutest ever crocheted flowers, leaves, and other motifs. What can we do with all those sweet little things? We can make Crochet Charm Lace, a beautiful lacy cloth that uses up our yarn leftovers of all weights and textures.

The best things about Crochet Charm Lace:
- You can make projects in any shape and size.
- You can use up leftover yarns and reduce your stash.
- You can mix together all kinds of yarns and weights of yarn.
- Other than trying for a “firm” gauge, gauge is unimportant.
I teach a 3-hour workshop about Crochet Charm Lace, where we make a small table mat, like this Forget-Me-Not project. To book the workshop, please email me at knitandcrochetwithsuzann at outlook dot com. Or click on Crochet Charm Lace in the categories menu in the sidebar at your right, and find lots of how-to and examples.

Here are more Crochet Charm Lace projects, and you can read a lot more
Photo credit: Interweave Crochet/Harper Point Photography

Credit: Noro Knitting Magazine Spring/Summer 2014, photo by Paul Amato for LVARepresents.com.


A Recycled Recycling Fairy Tale
Hans Christian Andersen’s original fairy tales have been reused and recycled into ballets, operas, and movies. “The Flax” isn’t as well-known as some of the others. It is a tale of struggle, contentment, and recycling.
The Flax
Retold by Suzann Thompson from the 1849 original by Hans Christian Andersen

“I am the cutest!” said the flax. “Look at my pretty flowers! They are as blue as the sky itself. Also, the farmer said that I will make a fine piece of linen someday…whatever that means.”
The sun shone on the flax and its many friends and family who lived in the field. Gentle rain watered it, and it grew tall and made more flowers that were delicate as butterfly wings.
“I am happy,” said the flax.
The days grew shorter and the sun cooler. People came to the field and pulled up the flax by its roots.
The flax cried, “Ouch! That hurts! What is happening?”
The people plunged the flax into water and left it for days.
“First they tear me out of the warm earth, and then they try to drown me,” said the flax mournfully. “I guess happiness doesn’t last forever.”
Finally the people took the flax out of the water and pulled off its leaves, which were by that time, I’m sorry to say, rotten. They placed the flax next to a fire to dry.
“Now they’re roasting me!” cried the flax, shocked at this ill-treatment. It tried to see the good side of the situation: “Maybe these sad experiences will teach me wisdom,” it said.
The people soaked and roasted and peeled and broke and combed the flax. Then they spun the flax around so fast it couldn’t even think.
“I’m glad I knew happiness once,” said the flax. “The thought of it comforts me in my pain.”
The flax and its friends and family were now thin, strong threads. A person threaded them on a loom and wove them together.
“Oh!” said the flax. “I see! It’s true that I suffered, but now I have become a beautiful length of linen fabric. Look at me! I’m so strong and light. This is far better than being a plant in a field.”
The flax was happy again. “I am so lucky,” it said.
A person bought the linen and took it home. The person cut the linen into pieces. Once more the flax which was now part of the linen said, “Ouch!” The linen was pricked with needles and pressed with a hot iron. “Ouch again!” said the linen.
When the person finished, the linen was an embroidered tablecloth, with cloth serviettes and monogrammed tea towels. It lay on the table during many meals and afternoon coffee klatches. Visitors commented how well the linen tablecloth looked with its matching accessories.
“Ah, to be useful and beautiful and admired must be the best of all worlds,” sighed the linen. “I’m happy.”
The linen cloth was used for so long, it wore out.
“I have worked hard, and now I am frayed and torn,” said the linen. “This must be the end.”
A person took the linen tatters to a mill, where they were shredded and soaked in water. They were pounded into a pulp. “Ouch,” said the linen in a tired, worn out voice. “Who knew the end would be so unpleasant?”
When the linen pulp awoke, it was dry and flat and thin. “Wait—what?” cried the linen. “I seem to be paper now. How wonderful!”
The linen paper was bought by a poet, who wrote funny, wise, sad, and glorious poems on the paper.
“How strange to think I once lived in a field. True, I had lovely blue flowers. I’ve been through many changes since then. Some were painful, but I feel I have become wiser,” said the linen paper which was once the flax.
The poet put the linen paper into a notebook and took it to coffee houses to read the wise and sad poems to coffee drinkers. The poet read the funny and wise poems to school children. The poet’s glorious poems were set to music and sung far and wide.
“Once, when I was a plant, I was delighted by the sun and rain,” reflected the linen paper. “Now that I am paper, the words written upon me delight people of all ages. The words help people remember things and think about their lives. By this, I am delighted beyond words.”
The poet grew old and stored the notebook with the linen paper on a bookshelf. The flax plant that became cloth that became paper is still there, wondering where fate might lead it next.
***
A translation of Hans Christian Andersen’s “The Flax” is at http://hca.gilead.org.il/flax.html.
The flowers and leaves in the illustration were crocheted with Berroco’s Remix®, a tweedy yarn blended from nylon, cotton, acrylic, silk, and linen, all of which are recycled from post-industrial waste. Find out more at http://www.berroco.com/yarns/berroco-remix.
This retelling was originally published in 2015 on American Textile Recycling Corporation’s blog Our Greener Tomorrow, at http://ourgreenertomorrow.com/guest-post-suzann-thompson-retells-hans-christian-andersens-the-flax. I can’t find it online anymore.
Free Fancy Pansy Crochet Flower Pattern
Thank you very much to all you lovely people who have bought my crochet books over the years–Crochet Bouquet, Crochet Garden, and Cute Crochet World! This free pattern is especially for you.
Fancy Pansy
Copyright 2021 by Suzann Thompson

You can use any yarn to make the Fancy Pansy. It is shown here in three colors, but it looks good with just two colors, where you use a dark color A, and a lighter color for B and C.
For the step-by-step sample shown here, I used Dale of Norway Baby Ull (A) color navy #5755; (B) color yellow #2106; (C) color blue #5726, and a 3.50mm (size E-4 U.S.) hook.
Worked in medium weight yarn (4), such as Cascade 220, with a firm gauge, a Fancy Pansy measures about: 5 1/4″ (13.4 cm) from top to bottom.
Special Stitches
Picot = ch 3, sc in 3rd ch from hook.
Htr = half treble crochet = yo twice, insert hook into st, yo and pull up a loop (4 loops on hook). Yo and pull through 2 loops (3 loops on hook). Yo and pull through remaining 3 loops.
Fancy Pansy Instructions
With A, ch 5, sl st into first st to form a ring.
Row 1: working into ring, sc, ch 3, sc, ch 2, place marker in ring, hdc, place marker in ring, ch 2, sc, ch 3, sc, ch 1, turn.
The markers are to show you where to place two sts in Rnd 4. They are a nuisance, so if you can remember that the marked spots are on each side of the hdc in Row 1, you can dispense with the markers.
Rnd 2, first petal: In the ch3-loop (sc, hdc, 3 dc, hdc, sc), sc into original ring (this forms an anchor-st for Rnd 3; place marker if desired).
Rnd 2, middle petal: in ch2-loop (sc, hdc, dc, htr, dc), hdc into next st. In next ch2-loop, (dc, htr, dc, hdc, sc). Sc into original ring (this forms an anchor-st for Rnd 3, place marker if desired).
Rnd 2, third petal: in the ch3-loop (sc, hdc, 3 dc, hdc, sc), ch 1, sl st into sc from row below. 3 sc into ring. Do not turn.

Photos 1 and 2 show the Fancy Pansy after Rnd 2, with and without the markers. The rest of the photos show the flower without the markers, because they are distracting.
Rnd 3, first petal: Working in front loop only, 2 sc, picot, sk 1, sc, (picot, sc in next st) twice, ch 1, sc around stem of anchor-st from Rnd 2.

Rnd 3, middle petal: Working in front loop only, ch 1, sk 1, (sc in next st, picot) 3 times, sl st in each of next 3 sts, (picot, sc in next st) 3 times. Sc around post of anchor-st from Rnd 2. (Photo 3 shows the flower worked to this point.)
Rnd 3, third petal: Working in front loop only, ch 1, sk 1 st, (sc in next st, picot) 3 times, sk 1, 2 sc, sl st. End off A. (Photo 4 shows the Fancy Pansy with Rnd 3 finished.)

In Rnd 3, you worked in the front loops only of Rnd 2. In this round, work in the back loops of Rnd 2. If it helps, bend the picots and sts of Rnd 3 forward, so you can see the back loops of Rnd 2 better.
Rnd 4, first petal: Join petal color B with a sc in the back loop of the first sc of Rnd 2. Continuing to work in the back loops of the sts of Rnd 2, 2 sc, (sc, hdc, dc) all in next st, (2 htr, dc) in next st, hdc, sc, insert hook into the anchor-st two rounds below and sc in this st.
Rnd 4, middle petal: Continuing to work in the back loops of the sts of Rnd 2, 2 sc, (sc, hdc, dc) all in next st, (3 htr) in next st, dc, hdc, dc, (3 htr) into next st, (dc, hdc, sc) in next st, 2 sc. Insert hook into the anchor-st two rounds below and make one sc in this st.
Rnd 4, third petal: Continuing to work in the back loops of the sts of Rnd 2, sc, hdc, (dc, 2 htr) in next st, (dc, hdc, sc) in next st, 3 sc. Fold petals forward, so you can see the back of the piece. Find the markers placed in Row 1. ( If you have not placed markers, look for the sts of the original ring, on each side of the hdc of Rnd 1.) Trc into original ring at the nearest marker (or nearest space next to hdc of Rnd 1), trc into original ring at the next marker (or space on the other side of hdc).

Photo 5 shows Rnd 4, complete, from the right side. Photo 6 shows Rnd 4, complete, from the back. The long sts are the trc sts which were worked into the original chain-ring.
Rnd 5, first petal: Beginning in the first st of Rnd 4, sl st 3, sc, picot, sk 1, sc, picot, (hdc, picot) twice, 2 sc, sl st, sk the long sc between petals.

Rnd 5, middle petal: sk the first st of this petal, sl st in next st, 2 sc, picot, sc, (picot, hdc) twice, picot, sk 1, sc, sk 1, sc, picot, sk 1, (hdc, picot) twice, sc, picot, 2 sc, sl st, sk the last st of this petal, sk the long sc between petals.
Rnd 5, third petal: sl st in next st, 2 sc, (picot, hdc) twice, picot, sc, picot, sk 1, sc, sl st 3. End off B. (Photo 7 shows Rnd 5, completed.)

Row 6: Join top-petal color C with sc in first trc-st from Rnd 4, (ch 2, sc) into same st, (sc, ch 2, sc) in next trc-st from Rnd 4. Ch 3, turn. (Photo 7 shows Row 6 just before the turning chain.)

Row 7: In ch2-loop, (hdc, ch 1, dc, ch 1, dc, ch 1, hdc, ch 3, sl st). Ch 2, which will separate the two top petals.
In next ch2-loop, (sl st, ch 3, hdc, ch 1, dc, ch 1, dc, ch 1, hdc, ch 1, hdc). Ch 2, turn. (See Photo 9.)
Row 8: Dc in 1st ch-space, (3 dc) in each of next three ch-spaces, (2 dc, ch 2, sl st) all in ch3-loop. Ch 3, skip ch2-loop between the petals.
For second petal, (sl st, ch 2, 2 dc) all in next ch3-loop, (3 dc) in each of next three ch-spaces, (dc, hdc) in last ch-space. Ch 3, turn.
Row 9: (picot, dc in next st) 3 times, (picot, trc in next st) 5 times, (picot, dc in next st) 4 times, ch 2, sl st in ch2-loop, ch 4.
Row 9, second petal: sl st in ch2-loop, ch 2, (dc in next st, picot) 4 times, (trc in next st, picot) five times, (dc in next st, picot) 4 times, ch 3, sl st in ch-loop. End off.

Use the yarn ends of C to tack the top petals in place on the back of the flower. Line up the outermost picot of each top petal with the lowest picot on the side petals, as in Photo 10.
In the photo below, the Fancy Pansy at the left is made from leftover yarns in my collection. They were all different brands, but very similar in weight. The right-hand Fancy Pansy was made from Cascade 220, then felted in the washing machine.

Seeking Crochet Apprentice
I am seeking a Texas crocheter to join me in a mentor/apprenticeship team to apply for the 2022 apprenticeship program, funded by Texas Folklife. Our project will be about Texas Thread Crochet Culture.
Read more about the Texas Folklife program we will apply for at www.texasfolklife.org/program/apprenticeships.
Find out more about me, Suzann Thompson, at www.textilefusion.com/about, where you can follow links to my artist’s resume and complete CV.

Apprenticeship applicants must:
- know how to crochet,
- have an interest in the tradition and culture of crochet in Texas,
- live in Texas,
- be at least 18 years old.
If funded, the project runs for six to eight months, beginning in January or February 2022. Texas Folklife recommends 8 to 12 hours of instruction per month. Outside of actual instruction, expect to spend time crocheting and preparing for lessons and the final presentation. Some travel will be necessary.
Our application to Texas Folklife’s Apprenticeship Program may not be funded. If that happens, we can decide whether we want to proceed on our own. If funded, our reasonable expenses will be covered, with some left over.

Committment
Apply to be an apprentice:
- Prepare the application at www.textilefusion.com/apprenticeapp.pdf, and return it to the address or email address listed on the application, by August 17, 2021.
- Prepare to take part in an interview, if called.
As part of the mentor/apprentice funding application team:
- Ongoing–Get to know each other via Zoom or in person, if possible. Texas Folklife wants mentors and apprentices to know each other and have a good relationship.
- Work together on a proposal for our six- to eight-month program of instruction, making, exploring Texas thread crochet culture, and preparing for final presentation. The deadline for sending funding application to Texas Folklife is early December 2021.
If our mentor/apprentice proposal is funded:
- The project runs for six to eight months, beginning in January or February 2022.
- We will work together virtually or in person, 8 to 12 hours per month.
- Apprentice and mentor will spend time outside of instruction in preparation for lessons, crocheting, doing homework, preparing the final presentation.
- Some travel will be necessary.
I have drafted a six- to eight-month plan for instruction, homework, and the end-of-apprenticeship presentation. Interviewees will receive the draft for review, and we will discuss during the interview. Apprenticeship applications are due to me by August 17, 2021.
The application is at www.textilefusion.com/apprenticeapp.pdf.
Please contact me with any questions at knitandcrochetwithsuzann@outlook.com.

Election Day

The wild success of a crocheted doily trim as the letter “O” in What to Do in a Democracy, got me thinking about other literary possibilities for the doilies in my collection.
Let’s see. Through the summer and fall of 2020 I worked to make sure people were registered to vote and encouraging them to actually do it. So what other word besides VOTE had an “O” to fit the theme?
The word “election” has an “O!” Yay! But my collection of vintage crochet didn’t include a round doily trim of a reasonable size.
I would have to crochet the “O” myself. Saying “I’ll do it myself,” makes me feel like the Little Red Hen, who had to plant, harvest, and grind wheat in order to make bread. “I’ll do it myself,” sounds really sassy in a broad Texas accent, which I, a Texan, can do.
Unlike the Little Red Hen, I was happy about crocheting the doily “O” myself. I took advantage of it being custom crocheted, by using red thread for the center, so it would fade into the red patchwork background. The last few rounds were in white to create the letter. I had to alter the pattern to make the doily small enough, because the bigger the doily, the bigger the finished quilt.

You can find the original doily on Ravelry, where the notes say it was “published as ‘The Very Best Circles’ in Home Favorites in Crochet, Book No. 214, in 1944; as ‘Three Piece Doily Set No. 7699’ in The Complete Book of Crochet in 1946.” Download the free pattern here.
Election Day was finished in 2020. See if you can find the not-so subliminal message in the quilt’s patchwork.
If you’re interested in how to create and applique the white lettering, read the post about What to Do in a Democracy. Link above.

What to Do in a Democracy

I was a new Volunteer Deputy Registrar in 2018. My job was to give people voter registration cards, help them understand the forms, and return the completed forms to the proper county office. It can be fun, or deadly dull, depending on how many people want to register.
How could I attract more people to the voter registration table?
Display a quilt, of course!
People would come by to check out a happy red, white, and blue quilt that reminded them to register to vote. They would surely ask me about it, especially if they or one of their relatives was a quilter. We would discuss the quilt, and I would ask casually, “By the way, are you registered to vote?”
Making a quilt seemed like a good plan.
Luckily, I had plenty of red, white, and blue fabric scraps. A doily in my collection had a fabric center and pretty crocheted trim. Hmmm. If I removed the fabric (it was damaged), the crocheted trim could be the letter “O” in VOTE. Perfect!

The quilt’s title is What to Do in a Democracy, and it was finished in 2019. I couldn’t resist a little subliminal messaging. Can you find it? Examine the patchwork and the buttons.
Someone asked, “Is the crocheted ‘O’ meant to be a tribute to Ruth Bader Ginsburg?” Well, I hadn’t considered that, but it sounded good to me, so…yes!
Displaying What to Do in a Democracy. has been fun, and it has led to pleasant conversation. However, my wish is that this quilt soon will be a quaint, out-dated relic. My wish is that every U. S. citizen is automatically registered to vote when they turn 18 years old.* I will happily hang up my Volunteer Deputy Registrar hat when that day arrives.
If You’re Interested in Process

The quilt had to be designed around the doily trim, because I couldn’t easily alter its size.
My favorite tool for rough-drafting wall hanging designs is Adobe Premier Elements.
I opened a new image and added a circle the size of the doily trim. That was the “O” in VOTE. From there, I tried different font sizes, until the rest of the text was the correct size.
Once the text was designed, I figured out how big the quilt background needed to be, designed stars, and placed them within the design.
I printed the design, full size, in a very pale grayscale to preserve toner. I trimmed and taped together the pages. Here’s how I created the letters and stars in fabric:
- Roughly cut letters out from the paper.
- Cover the backside of each letter with basting spray.
- Arrange sprayed letter on white fabric.
- Cut out the letter carefully, using paper as the pattern.
- Turn paper/fabric letter to fabric side and spray again with basting spray.
- Arrange letter in its place on the finished quilt top.
- Carefully remove paper.
- Zigzag stitch all around the cut edges of the fabric letter. This is one method of raw-edge applique.
- Repeat steps for each letter.
* Undoubtedly, some will un-earn the privilege later on, but until that happens, let’s give everyone the benefit of the doubt.
Constant Comets

I have a dream, where stars are frolicking in the night sky.
It’s a recurring dream. I’m outside at night. I look up, and stars are chasing each other across the sky, turning somersaults, and tumbling around in crazy spirals. They’re playing. Like I said before, they’re frolicking.
The dream makes me happy, and I’m glad it comes back from time to time.
Dreams give us a glimpse into our unconscious. Since humans seem to share a collective unconscious, I think—I hope—that art inspired by good dreams resonates with people on an unconscious level and affects their waking lives.
I’m pretty sure that Constant Comets was influenced by my dream. Other things added to the inspiration. Doilies with star or star-like motifs play into my vision of a night sky. I don’t know what it is about doilies crocheted with white and golden-yellow, but they look to me like blazing celestial bodies.
Then there’s the combination of royal blue and golden yellow and white. It’s a delicious combination—one of my favorites. Luckily, my stash had a lot of royal blue bits of fabric at the time when Constant Comets got underway.

To get a feel for how my doily comets would move across the sky, I made a digital sketch, starting with photos of the doilies I was going to use. I measured each doily and made sure the digital measurements matched the real ones. That way the proportions in the sketch were more-or-less accurate. (I use Adobe Photoshop Elements. It has all the features I need, but is much more affordable than the full Adobe Creative Suite.)
After arranging the doily pictures, I roughly sketched in the comet tails. When you’re working on something up close, it can be difficult to see the bigger picture. The sketch gave me an idea of the bigger picture, but I wasn’t obligated to copy it exactly.

It was time to make the quilt top. When I’m trying to use up fabric scraps, I first patch together some medium-sized blocks. I lay them out on the floor, within the desired measurements of the quilt top. Then I fill in the empty spaces with more patches.

When the top was done, I started sewing on doily comets, and I couldn’t wait to start giving them tails!

Constant Comets has been exhibited as part of the Celebrate Doilies art quilt show since the summer of 2017. It will be in the show “Pieces of Us,” through June 25, 2021, in Stephenville, Texas. Details here.
My favorite memory about Constant Comets was when Celebrate Doilies was in Comanche, Texas, at the 4 North Event Center on the town square. That was when I first met Pat Reese, a fellow textile artist. We became friends immediately. Pat gave me a wonderful compliment about Constant Comets. “It makes me want to sing,” she said.

***
Find Constant Comets in TextileFusion’s Market. The wall hanging measures 39 x 46 inches.
Studying Yellow, Part One
Once there was a wonderful magazine called INKnitters, published by Diane Piwko. I contributed long, in-depth articles about all kinds of things related to knitting. Color was a focus. I was particularly interested in yellow, as you’ll read below. The article was finished and photos taken, when Diane decided to discontinue publishing INKnitters in 2006. It was the end of an era.
Sunshine, cowardly, lemon, journalism: yellow is many things. I was surprised learn that yellow is also “difficult.”
A friend took a creative color workshop with a well-known knitting instructor. Each student chose one color to study for the day. “But don’t pick yellow,” said the instructor. “It’s difficult.”
I scoffed at this, but to my amazement, someone made the same pronouncement at an international quilt show.
Well, I say if a color is allegedly difficult, working with it is the only way to learn to use it well.
So let’s take a look at yellow together, then you can use these methods to study any color you may find difficult. The best part is, no color wheel is necessary.
Basic Steps
Decide which specific variety of your chosen color you want to study.
Yellow ranges from pale creams (yellow + white) to rich olive shades (yellow + black). Yellow school-buses are really orange-yellow, while fluorescent yellows have greenish overtones. Given the large variety of yellow, I concentrated specifically on brilliant yellows.

Step 1: Observe Your Color in Different Surroundings
Look for your color in nature, in human environments, in magazines, quilts, your own home, photos, museums, and books. At this stage, the goal is to gather lots of information about the color, and avoid judging the color combinations you see.
Step 2: Answer these questions about the color and its surroundings.
- What other colors are near the study color?
- Are the nearby colors lighter, darker, or similar in tone to your color?
- Do you see shadows or highlights that enhance the study color?
- What are the proportions of the various colors?
Tip: Answer the questions in words, spoken or written, rather than just taking a visual impression in your brain. Writing answers on paper may help you focus on what you actually see, rather than what you remember from a mental snapshot. I’m always forgetting details about my mental snapshots.
Step 3: Make Sample Swatches
Knit or crochet samples with the color combinations you observed. This is your chance to try out some interesting stitch patterns. I still use Barbara G. Walker’s treasuries of knitting patterns. For crochet, my favorite is Harmony Guide to Crocheting Techniques and Stitches, by Debra Mountford, editor (1992).
Yellow in Nature

We have lots of yellow out here in rural Texas, so I took some photos for this study. Here’s a picture of a county roadside near our house.
I wrote answers to the questions listed above:
The lemon and orange-yellow flowers are surrounded by deep yellow-green and paler dusty-green leaves; also light brownish-gray dried leaves. The caliche road and the earth are light beige with pink undertones, but very bright. Flower centers and shadows are dark. Shadows aren’t exactly black. The amount of yellow is small in comparison to the greens and browns.
Just so you know, you may not like how your samples turn out. I didn’t like this one.

Going back to the original photo and my own words, I realized the deep shadows that added contrast to the scene were missing. Here’s the next sample with the deep shadow color added.

I wasn’t overly fond of this one either, but I have learned not to let this put me off. Making these samples time well spent. I learned something about these colors together. They may be perfect for a wall hanging someday. They may look better in different proportions. They may look a lot better to me in a few years.
It was time to move on.

Like this picture of nightshade berries and a grasshopper, yellow in nature is often seen with black, gray, and various shades of brown. Some tan or grayish birds have a patch of yellow feathers.
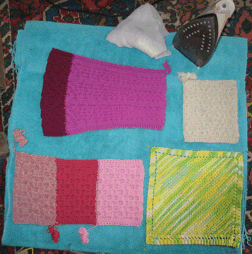
Here are knitted samples of yellow with grays and tan.

They’re alright. Interesting.
Next time: Yellow Around the House.